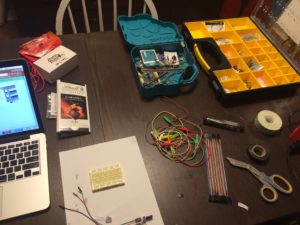
In an earlier post, I introduced a challenge I set for myself: to learn to code an Arduino microprocessor using only resources that are available online. Ultimately, I will program my LilyPad Arduino USB to illuminate my daughter’s tutu with LEDs.
Arduino and Me
When I began this adventure, I had little experience with microprocessors, programming, or circuits. My limited experience was from teaching Vex robotics in a tightly scaffolded environment, where it is almost impossible to wire inputs and outputs incorrectly.
This project has been a huge stretch for me, but it is worth it. I wrote in an earlier post about Seymour Papert, the father of making and the theorist behind constructionism. Papert, as cited in Burker (2015), said that there are “Eight Big Ideas Behind the Constructionist Learning Lab” (Loc 1687). I am constructing my own learning by doing, using technology as a building idea, having hard fun, and making to learn – the first four of those eight big ideas.
First Steps
I began by installing the Arduino IDE software on my computer so that I can code my Arduino. I wrote some sketches, instructing my Arduino to blink on and off one second at a time, then on and off 1/10 second at a time.
- Guiding me through these initial steps were:
I began with Blum’s tutorial. Each time I got stuck, I referred to the Getting Started guide. Next I began watching a series of five videos from I Like to Make Stuff. Those videos provided a solid foundation of vocabulary and content knowledge, and helped me move to the next step.
Then Things Got Confusing
Things went pretty smoothly with the I Like to Make Stuff videos until Arduino Programming Part 3 // Maker 101. In that video, Bob Clagett gives instructions on how to program the Arduino to send a message to make an LED blink at different rates using a potentiometer. He sets up the circuit using a breadboard.
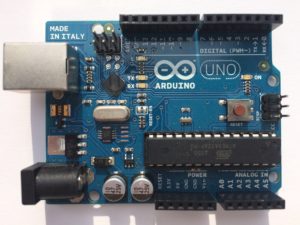
At this point, a few things happened at once. Having never used a breadboard, I concurrently began watching Simply Electronics’ How to Use a BreadBoard. My head was swimming with electronics information, and this was the third YouTube content creator in a row to demonstrate using the Arduino Uno. The Uno is a popular Arduino board.
Thankfully, I had an Arduino Uno available in addition to the LilyPad. Instead of watching videos featuring Uno and trying to translate them for LilyPad, I decided to switch gears and use the Uno instead. It was a huge help. I was then able to use How to Use a BreadBoard to create a circuit with multiple LEDs on a breadboard where the Arduino acted as a power supply.
Then, once I had done that, I was able to follow along with Arduino Programming Part 3 // Maker 101 and make a circuit with one LED and a potentiometer. The potentiometer allowed me to control the rate that the LED was blinking.
Finally, I used my knowledge from the breadboard video to add a second LED that was powered and controlled by the Arduino. The blinking rates of both LEDs could now be controlled by the potentiometer.
Next Steps
I have created a circuit with Arduino Uno instructing two LEDs to blink at a rate that is controlled by a potentiometer. My next step is to figure out how to swap my LilyPad in as the microcontroller, then to learn more about the different kinds of inputs and outputs I can use with my LilyPad.
related posts
This is the second of three posts about learning to code the Arduino. You can read about my decision to make this project in my first post. You can read about how it all worked out in my third post.
References
Burker, J. (2015). The invent to learn: guide to fun. Torrance, CA: Constructing Modern Knowledge Press. Retrieved from https://www.amazon.com/Invent-Learn-Tinkering-Engineering-Classroom-ebook/dp/B00CQDRF84/ref=sr_1_1_twi_kin_1?ie=UTF8&qid=1501470374&sr=8-1&keywords=kindle+invent+to+learn
IMAGES
All images and videos in this blog post were created by Sarah Van Loo.


