Author: sarah

Questioning the Wicked Problem of Teaching Complex Thinking

Each year The New Media Consortium reports on key trends, significant challenges, and important developments in the field of educational technology. Among the significant challenges of 2015 was teaching complex thinking (Johnson, Becker, Estrada, & Freeman, 2015). The problem itself is complex enough that we could refer to it as a “wicked problem.” According to Koehler and Mishra, these are described as problems that “have incomplete, changing and contradictory requirements” (as cited in Week 4 – Learn, 2017).

“Rodin’s The Thinker” by Andrew Horne, retrieved from https://commons.wikimedia.org/w/index.php?curid=15582363, is licensed under Public Domain.

Because of the changing nature of wicked problems, it is impossible to come up with a perfect solution. Instead, my team Laura Allen, Guadalupe Bryan, Alex Gorton, and I worked to investigate and try to offer a “best bad idea”  in response to the problem of teaching complex thinking (as cited in Week 4 – Learn, 2017).

We approached this wicked problem from the perspective of A More Beautiful Question. We hoped to ask “an ambitious yet actionable question that can begin to shift the way we perceive or think about something – and that might serve as a catalyst for change” (Berger, 2016, p. 8).  Although our problem is unsolvable, we can still be a catalyst for change – if we know what to do.

Using the method presented in A More Beautiful Question, we asked Why, What If, and How. The most challenging aspect of this approach was giving time and thoughtful consideration to each phase in order to ask good questions. Berger points out that we’re deluged with answers, but “to get to our answers, we must formulate and work through the questions ourselves” (Berger, 2016, p. 3).

In our shared planning document, we brainstormed and took notes. Together, we asked 55 Why questions. When we ask Why, it helps to approach the problem from an inquisitive, almost childlike perspective. This led to our beautiful, driving question:

How are teachers addressing the complex thinking skills necessary for students to become productive and innovative 21st-century learners?

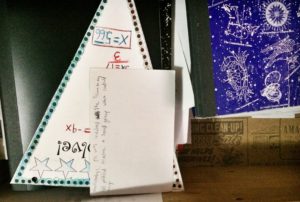
I needed to give our complex problem the consideration it deserved. Before moving on to the What If phase, I crafted this infographic about the complexity of our problem:

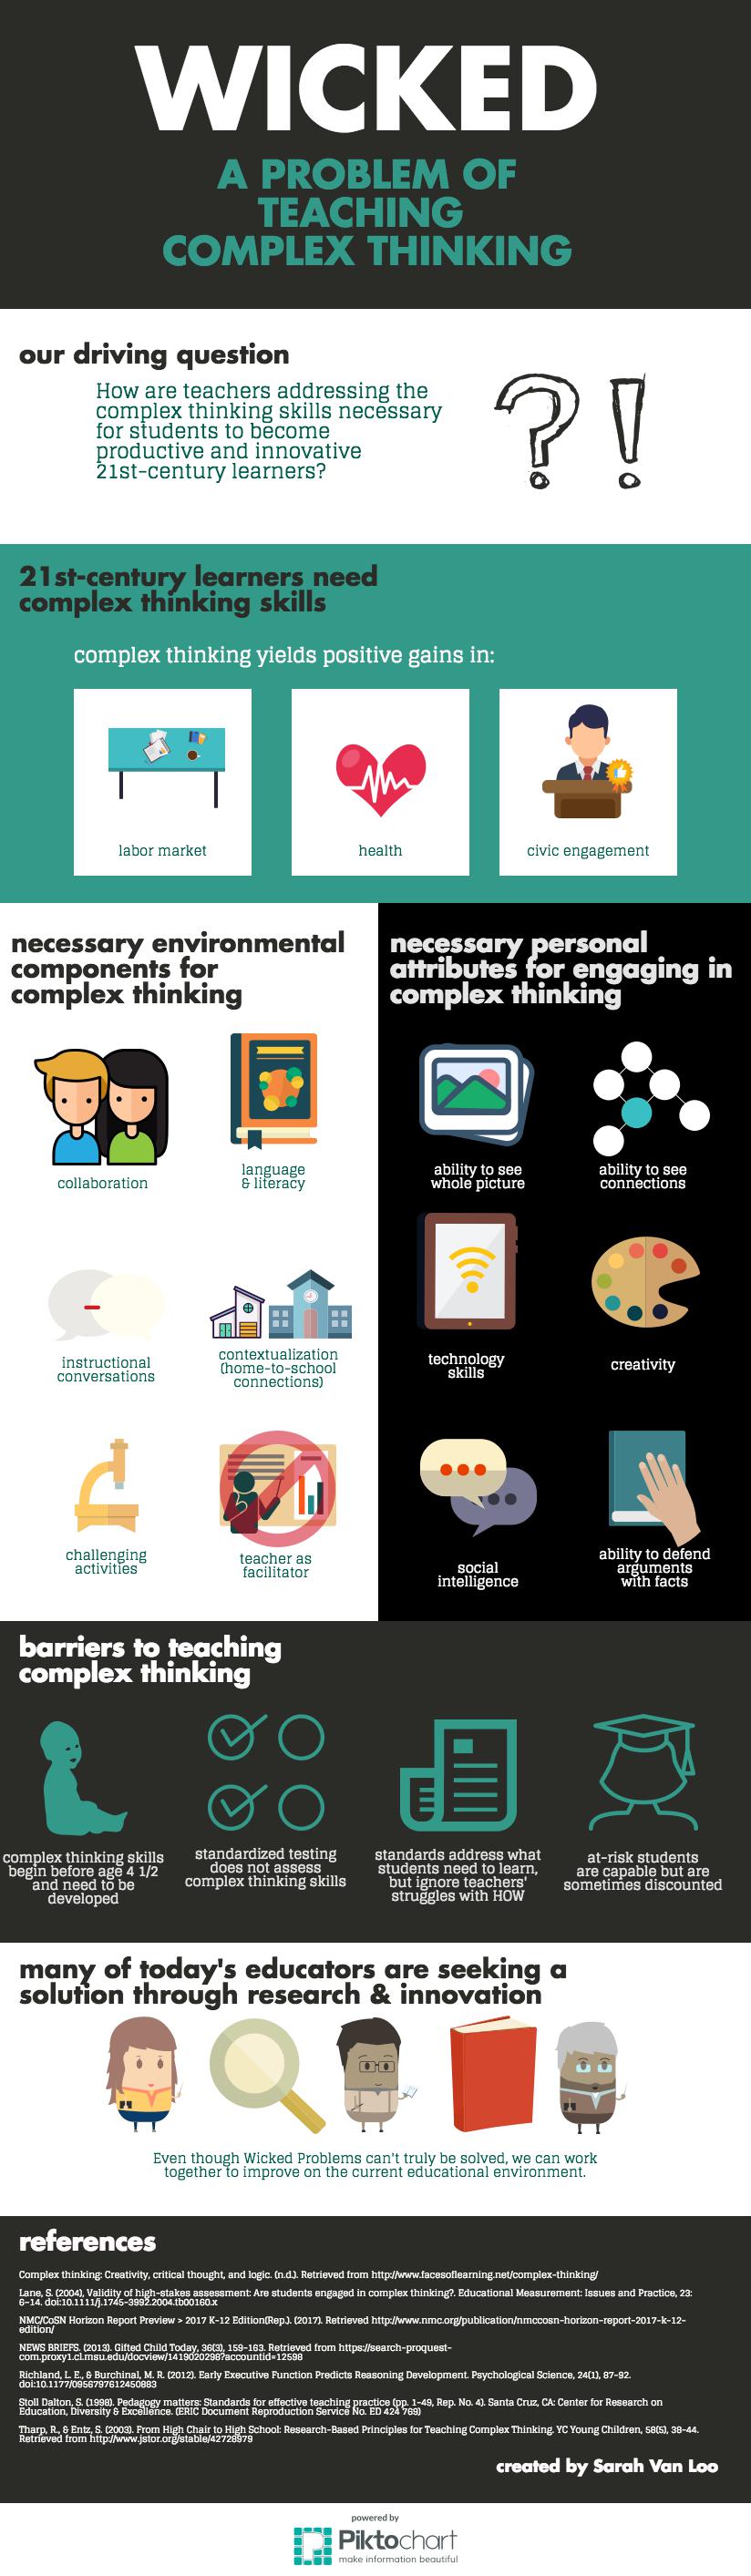
After arriving at our driving question, we responded by asking What If. When we ask What If, we use creative, divergent thinking to expand the possibilities to explore.

Around this time, we surveyed other educators in our professional learning networks (PLNs) about our wicked problem. Based on the results of the survey and on the What If questions we asked, our team singled out one What If question:

What if students had more freedom/choice in developing their complex thinking skills?

With our survey results in and our What If question settled on, we investigated current research around the question of How. We researched four current educational trends around student choice: project-based learning, genius hour, authentic inquiry, and student choice in assessments.

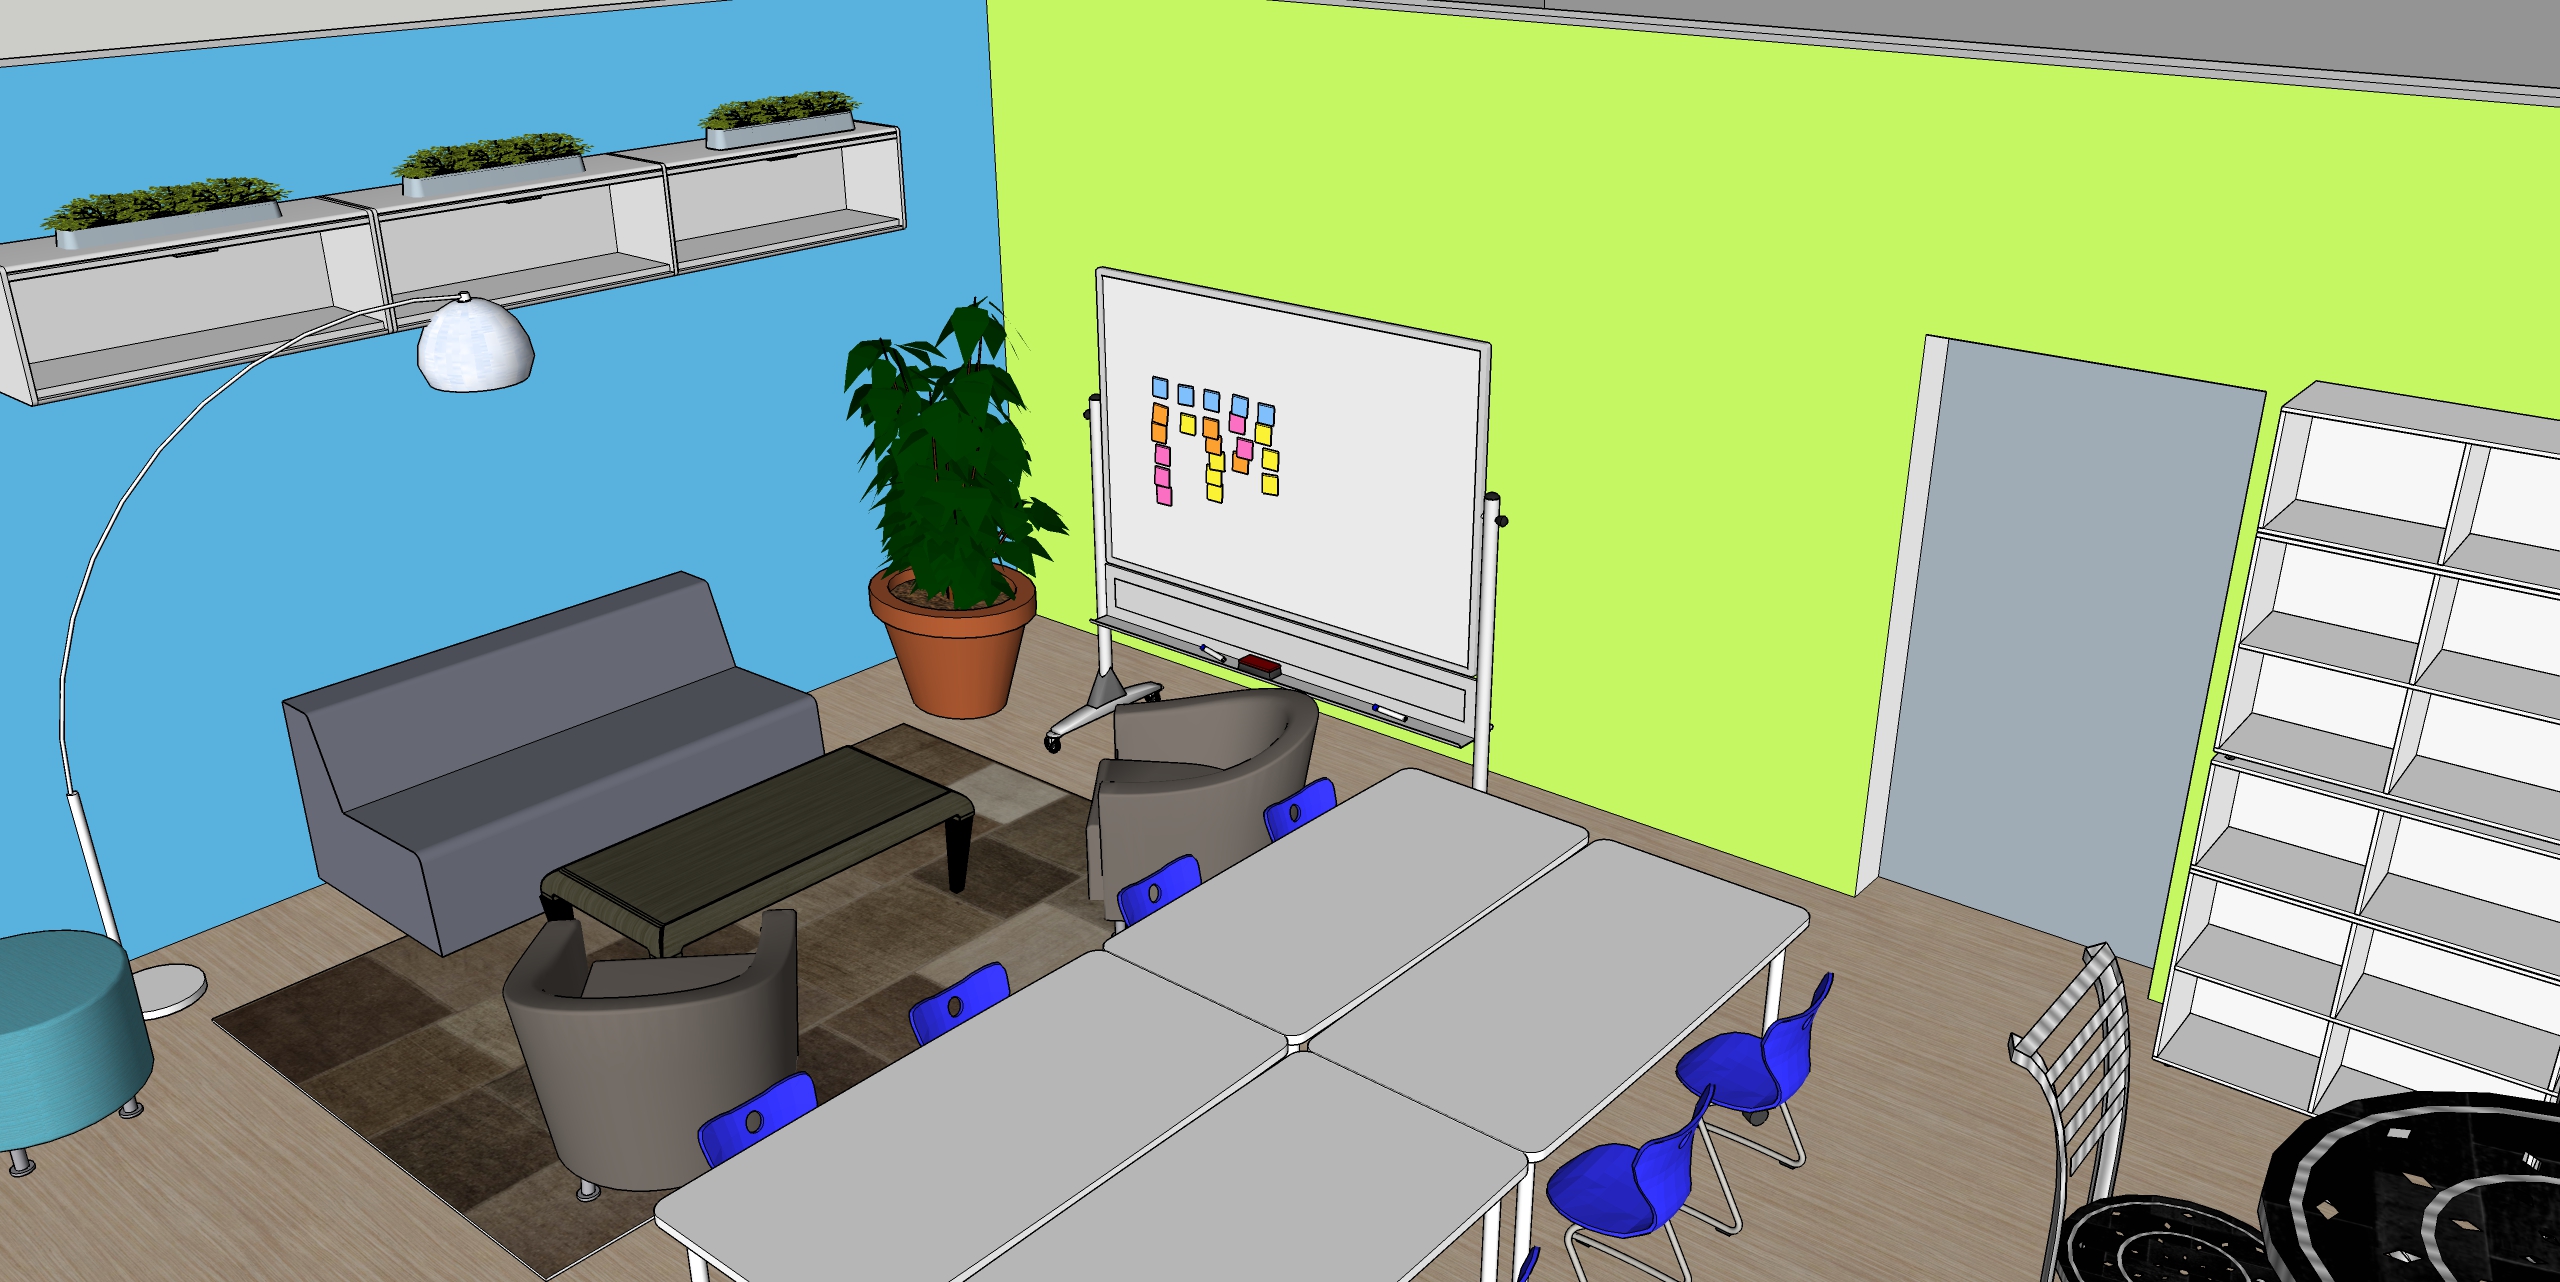
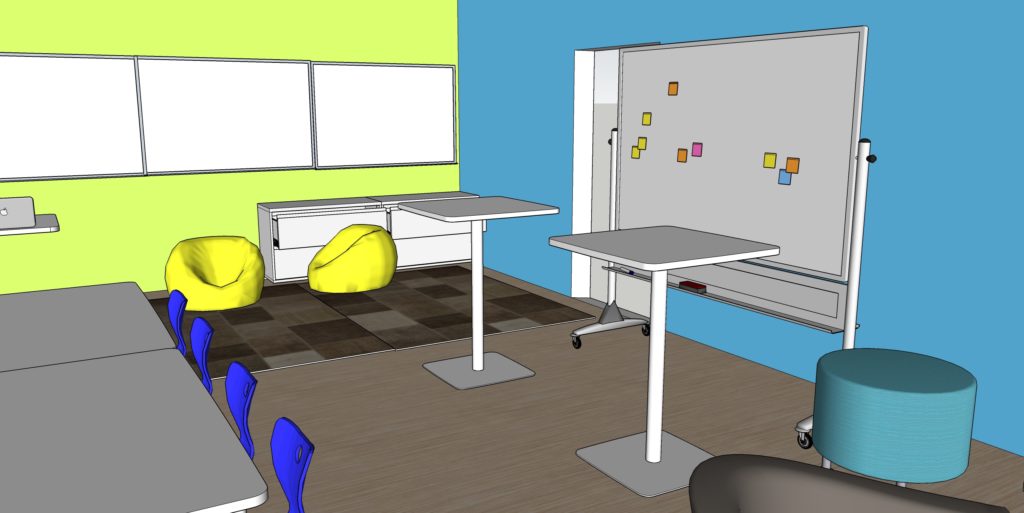
Check out our ThingLink below to see our group’s presentation of this entire process. We describe our methods, survey and results, and practical ways to introduce student choice in a 21st-century classroom. Don’t miss our references in the lower left if you want to learn even more. (If your browser doesn’t allow you to click on all the links, go directly to the ThingLink site.)


Reflections

Collaborative teamwork is a 21st-century skill that our group used to great effect. Even though we were never all in the same room for this, apps like Zoom, text messaging, Google Docs, and email helped us undertake this complex project.

The process was challenging at times, but the results were worth it. I am excited to try out some of our suggestions in my own class this fall.

References

Berger, W. (2016). A more beautiful question: The power of inquiry to spark breakthrough ideas. New York: Bloomsbury.

Johnson, L., Becker, S. A., Estrada, V., & Freeman, A. (2015). NMC horizon report: 2015 K-12 edition. Austin, TX: The New Media Consortium.

Week 4 – Learn. (2017, July 22). Retrieved from http://www.msuedtechsandbox.com/MAETely1-2017/week-4-wicked-problems/week-4-learn/

Images

Unless otherwise captioned, all images and videos in this blog post were created by Sarah Van Loo or the students of MAET Year 1.

STEAM Power for the 21st-Century

Today’s workforce requires graduates with 21st-century skills of collaboration, communication, creativity, and critical thinking, as well as entrepreneurship and innovation. These skills are needed in both the private and public sectors, but many of today’s graduates don’t have them (Jolly, 2016).

Today’s graduates are not qualified to fill many tech positions in the public and private sectors.

Hoping to solve this problem, a new movement focuses on educating students in science, technology, engineering, and math (STEM). Yet even with continuing unemployment, many tech companies are still unable to find graduates with the 21-century skills they need (Jolly, 2016).


STEAM: Today’s Answer to STEM?

We need innovators and creative thinkers to help transform our economy. In the 20th-century, that transformation came about through science and technology. In this century it’s art and design that are poised to help facilitate that change (“STEM to STEAM”, n.d.).

This understanding has fostered the STEAM education movement, which adds art, design, and the humanities to the four STEM subjects (Johnson Becker, Estrada, & Freeman, 2015).

Why STEAM?

Hierarchy of Education Subjects, Based on Robinson, 2006

Teachers and administrators face increasing pressure from policymakers to meet benchmarks in proficiency and growth. The result is more time spent practicing test taking skills and less time spent in student-centered, inquiry-driven lessons. This narrow-minded focus on testing leads to narrow-minded thinking. The result? “Young Americans are being educated out of creativity” (Pomeroy, 2012).

We need creative students, though. Creativity is closely related to divergent thinking, the kind of right-brained thinking that leads to fresh ideas and new perspectives (Connor, Karmokar, & Whittington, 2015). When coupled with convergent thinking, the partnership produces the kind of innovation we are seeking (Maeda, 2012).

Creativity, “the process of coming up with original ideas that have value,” is now “as important in education as literacy” (Robinson, 2006). Unfortunately, the hierarchy in education places math and languages in a position of importance above the arts. This hierarchy denies the importance of the disciplines coming together. Yet where the different disciplines come together, like in STEAM education, is where creativity flourishes (Robinson, 2006).

Where Is STEAM’s Place if We’re Prepping for the Test?

Research shows that students who have a background in arts do better on standardized tests (Johnson et al., 2015). They are also leaders in entrepreneurship and inventing. Michigan State University researchers studied a group of MSU Honors College graduates. Those with arts exposure were more likely graduate from a STEM program and to own businesses or patents (Lawton, Schweitzer, LaMore, Roraback, & Root-Bernstein, 2013).

Artistic endeavors while young helped foster the kind of innovation that creates jobs and invigorates business. “So we better think about how we support artistic capacity, as well as science and math activity, so that we have these outcomes” (Lawton et al., 2013).

My Own Experience as a STEM / STEAM Educator

My current position is that of a K-5 STEM educator. In my role, I teach Project Lead The Way, a national curriculum with the aim of helping students learn 21st-century skills.

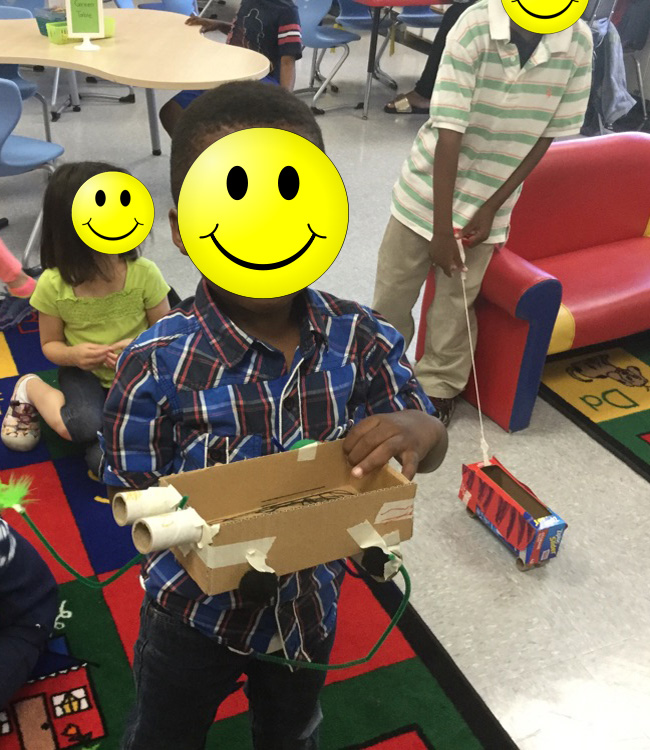
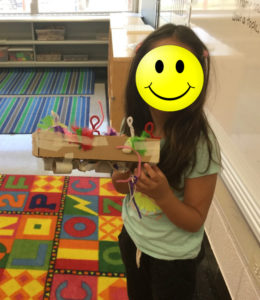
Last year, my kindergarteners learned about pushes and pulls. Their final project was to design and build a model that would move some blocks up a ramp. When I taught this unit at my first school during the first half of the year my students were successful. They all met the design challenge.

Before I taught at my second school, though, I had some time for reflection. I made a few simple additions to my supplies for building day. I brought along some feathers, pipe cleaners, pom poms, and cutoffs from cardboard tubes. I did not tell the students what they were to be used for and the design criteria remained the same: they were to build a model that could push or pull the blocks up the ramp.

The results were fantastic! Yes, they all moved their blocks up the ramp but they became inventors in the process. One student added a “monster sprayer” to her model. A second told me, “And this is a purse; you can carry it.” One of my young engineers told me, “It has a camera, and a hand for picking up rocks, and a hammer for smashing rocks.”

Looking Forward

I feel privileged to be at the beautiful intersection of two STEAM disciplines. Trained as a Visual Arts Educator and earning a master’s in educational technology, I am in a position to infuse art into any STEM lesson that I can. If I am ever back in an art room, my goal will be to put technology into the hands of my art students. Either way, I look forward to educating tomorrow’s creative world changers.

References

Connor, A. M., Karmokar, S., & Whittington, C. (2015). From STEM to STEAM: Strategies for enhancing engineering & technology education. International Journal of Engineering Pedagogy (iJEP), 5(2), 37-47. doi:10.3991/ijep.v5i2.4458

Johnson, L., Becker, S. A., Estrada, V., & Freeman, A. (2015). NMC horizon report: 2015 K-12 edition. Austin, TX: The New Media Consortium.

Jolly, A. (2016, April 29). STEM vs. STEAM: Do the Arts Belong? Retrieved from http://www.edweek.org/tm/articles/2014/11/18/ctq-jolly-stem-vs-steam.html

Lawton, J., Schweitzer, J., LaMore, R., Roraback, E., & Root-Bernstein, R. (2013, October 22). A young Picasso or Beethoven could be the next Edison. Retrieved from http://msutoday.msu.edu/news/2013/a-young-picasso-or-beethoven-could-be-the-next-edison/

Maeda, J. (2012, October 02). STEM to STEAM: Art in K-12 Is Key to Building a Strong Economy. Retrieved from https://www.edutopia.org/blog/stem-to-steam-strengthens-economy-john-maeda

Pomeroy, S. R. (2012, August 22). From STEM to STEAM: Science and Art Go Hand-in-Hand. Retrieved from https://www.yahoo.com/news/stem-steam-science-art-hand-hand-115600026.html

Robinson, K. (2006, February). Retrieved from https://www.ted.com/talks/ken_robinson_says_schools_kill_creativity

STEM to STEAM. (n.d.). Retrieved from http://stemtosteam.org/

Images

All images and videos in this blog post were created by Sarah Van Loo.

Redesigning a Classroom Space for 21st-Century Learners

When I considered the ideas of TheThirdTeacher+ (O’Donnell, Wicklund, Pigozzi, Anderson, & Mau, 2010) and how I could apply them to redesigning my classroom for 21st-century learners, I found the challenge exciting. Using the questioning technique (Why? What If? How?) from A More Beautiful Question allowed me to consider the design challenge from various perspectives (Berger, 2016).

Why redesign the classroom?

In my current teaching position, I teach K-5 STEAM curriculum in two elementary schools and travel with my teaching materials on carts. Since I don’t have a classroom of my own to redesign, I imagined a typical classroom space in one of my two schools. I chose a 25’ x 35’ rectangular space with one door and two large windows with a large closet for storage and tools.

More than one classroom in both schools featured old, heavy, rectangular desks in rows. That kind of classroom arrangement began as far back as the Civil War and continued to thrive as factory workers were educated in the early 1900s (Stoll Dalton, 1998). That kind of classroom was what I envisioned as a took on the redesign challenge.

My goal in redesigning my classroom is to create a context for educating students in 21st-century skills. These include communication, collaboration, systems thinking, creativity, and analytical habits (Long, 2012).

Overhead view of redesigned classroom for 21st-century learners

This classroom has spaces for students to work individually, in small or large groups, at tables, standing, or in comfortable spaces. By facing each other instead of the front of the room, I am creating a space that is student-centered.

What If?… Reimagining the classroom

The Third Teacher proposes 79 Ways You Can Use Design to Transform Teaching + Learning (O’Donnell et al., 2010). Using many of these design suggestions, I considered how the space could be restructured and improved.

This space reflects current mindsets about learning. In my classroom, I “make peace with fidgeting” (#20) by incorporating VS chairs that are designed to allow students to rock slightly, sit in the chair backward, and even sit on the backs of the chairs. It “cherishes children’s spaces” (#3) with large rugs and beanbags and a space with a couch and soft chairs (O’Donnell et al., 2010).

Soft spaces are inviting for children and promote collaboration.

My design “makes classrooms agile” (#23)  by incorporating wheeled tables and whiteboards that allow the spaces to be easily reconfigured for multiple purposes. It is “designed for speech and hearing” (#8) by including sound-absorbent rugs and soft furniture, as well as a sound field. With this device in the room, the teacher can speak in an even tone and all students can still hear well.

The space “supports great teachers” (#12) by removing the teacher desk. The teaching equipment is mobile, allowing the teacher to support students where they are (O’Donnell et al., 2010).

A mobile teaching center allows the teacher to move around the classroom.

How Will We Redesign The Learning Space?

I illustrated my reimagined learning space including rolling tables, child-friendly chairs, and multiple spaces for small groups. I included plants, lamps, modern educational technologies, lots of storage space, and great maker tools (a laser cutter, 3D printer, and vinyl cutter).

Rolling tables and whiteboard allow the classroom to be easily reconfigured. Stand up desks allow an alternative to sitting at tables.

The decisions I made in my design were partly limited by the availability in SketchUp’s 3D Warehouse. For example, VS makes wheeled tables with rounded corners that can be reconfigured in myriad ways. These tables were not available in the warehouse, so I opted to use rectangular tables that do not have the same range of options for arranging them.

According to Experience Design, students’ experience includes their participation in the room and with each other. It also entails emotion so it’s important to consider how they will feel in the space (van Gelderen, 2010).

A cafe table is a fun space for students to collaborate with each other or meet with the teacher.

My design allows us to “open the doors” (#60), “display learning” (#15), and “emulate museums” (#16). These all involve displaying student’s work as though the classroom were a gallery space. I included multiple open shelving units and blank walls (O’Donnell et al., 2010).

Digital fabrication tools for student use: laser cutter, 3D printer, and vinyl cutter

I would know if the classroom redesign met students’ needs in several ways: Are students using the space more collaboratively? Are they independently using the unique resources of the room, such as the laser cutter? Have they taken ownership over the classroom gallery of student work?

Closing Thoughts

The space itself can only go so far: I have to use it wisely. As a teacher, I must make the choice to use different spaces differently (#10), allow students to have a choice about what they want to do (#14), and allow for uniting art and science (#18) (O’Donnell et al., 2010).

References

Berger, W. (2016). A more beautiful question: The power of inquiry to spark breakthrough ideas. New York: Bloomsbury.

Long, C. (2012). Teach your students to fail better with design thinking. Learning & Leading with Technology,16-20. Retrieved from https://static1.squarespace.com/static/509c0d15e4b058edb8f35a86/t/50f49750e4b0c7661ad2efc5/1358206800803/FailBetter_DesignThinking ISTE article.pdf.

O’Donnell, Wicklund, Pigozzi, Anderson, & Mau, B. (2010). 79 Ways You Can Use Design to Transform Teaching Learning. Retrieved from https://static1.squarespace.com/static/509c0d15e4b058edb8f35a86/t/50ec7ca4e4b01d8c697c0b6c/1357675684568/79 Ideas Overall List.pdf

Stoll Dalton, S. (1998). Pedagogy matters: Standards for effective teaching practice(pp. 1-49, Rep. No. 4). Santa Cruz, CA: Center for Research on Education, Diversity & Excellence. (ERIC Document Reproduction Service No. ED 424 769)

Van Gelderen, T. (2010, February 09). Retrieved August, from https://www.youtube.com/watch?v=BB4VFKn7MA4

Images

All images in this blog post were created by Sarah Van Loo using SketchUp.

I Completed My First Arduino Project

This summer I made something that I am really proud of! I illuminated a tutu with a LilyPad Arduino using only online resources. I was challenged to set aside traditional learning resources, which I wrote about in an earlier post.

My Struggles

In a previous post on this topic, I wrote about my lack of experience with this platform. I also wrote about switching between Uno and LilyPad.

After I got my Uno controlling a series of LEDs on a breadboard, my next step was to code the Uno to control four NeoPixel LEDs. I installed the NeoPixel library in the Arduino IDE.

I coded a simple sketch to illuminate the NeoPixels. Then I pulled in an example sketch from the NeoPixel library. The steps in coding are: write the sketch, verify it, then upload it. In my experience coding, if error messages come back at either the verify or upload stage, the sketch will not work.

I got a message when I attempted to upload my sketch that said, “User configuration file does not exist or is not a regular file, skipping.” In RED. That was one of approximately 60 lines in the error message.

So I researched. For hours, I read Internet help forums in which other Arduino Makers had reported the same error. From what I could find, it appeared that my version of Mac OS was not going to work with Arduino. I began to envision having to scrap this project and start over. I spent at least four hours reading and uninstalling and reinstalling the Arduino IDE. I even opened the Mac Terminal and considered manually inputting some instructions directly into the command line.

Then it happened. After hours of reading and more than a few tears shed, I found it. On the Arduino Product Forum, someone had written, “Don’t worry, it’s not an issue to have this message – it will use the supplied default. :)” The smiley face was really included in the forum post. I am sure I had read this message ten times. This time, though, I realized what it meant: my code would work, in spite of the error message. I tried one more time and it worked!

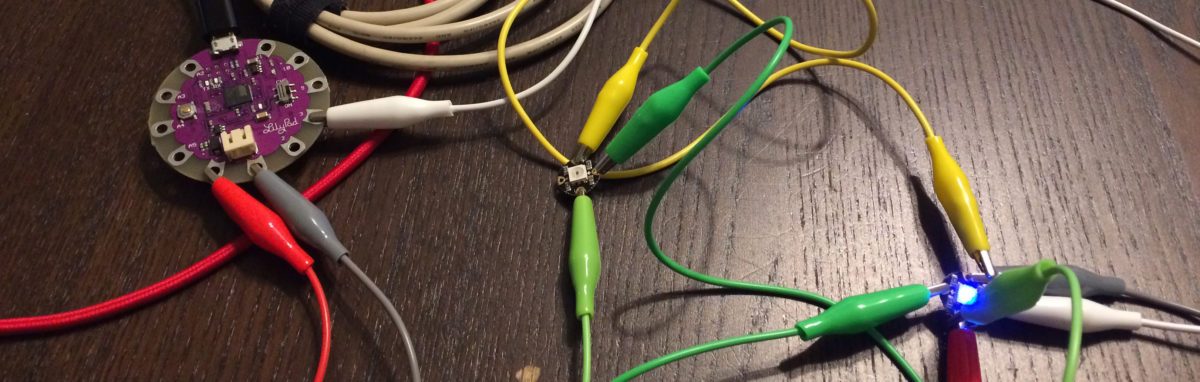
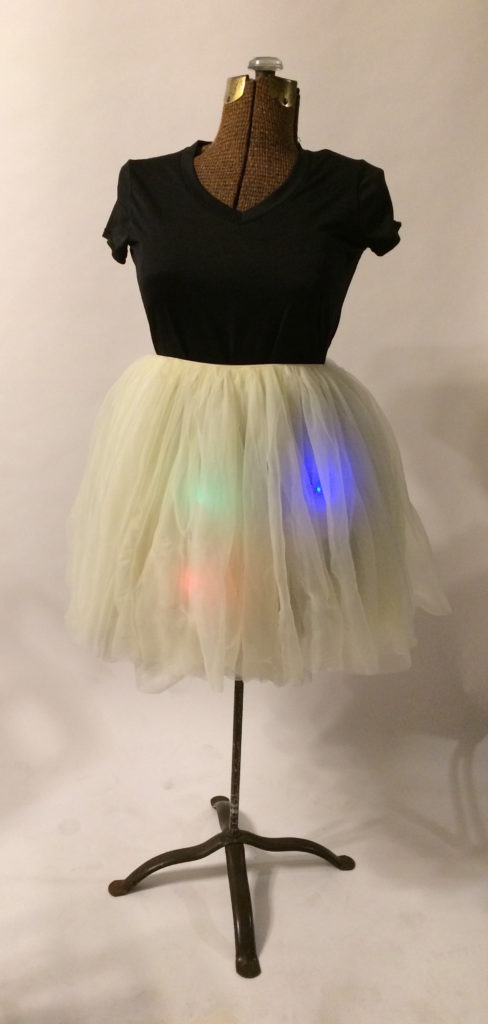
My troubles weren’t over, however. When I tried to switch from the Uno to the LilyPad, I discovered that my LilyPad had gotten broken so I ordered a new one. Once it arrived, I was finally able to switch from the Uno to the LilyPad and got my LilyPad to light up the NeoPixels.

My Success

Next, I connected all the NeoPixels to the LilyPad using wire and electrical tape. It would have been more elegant to use conductive thread but I made this choice in the interest of time.

Finally, I moved the LilyPad to battery power. I attached my daisy-chained NeoPixels and the LilyPad to the tutu. The results were lovely, and I was delighted.

As Jaymes Dec, teacher and Innovation Specialist says of digital tools, including Arduino, “I really want my students to lose their fear of failure,” (Burker, 2015, Loc 1731). I can attest to the fact that I truly thought I was about to fail during this project. In the end, I succeeded. I made something I didn’t know I could make and I learned a lot about microprocessors and myself in the process. Through persistence, I can figure out just about anything. And when something is so difficult that it hurts, overcoming is the sweetest success!

please watch my maker video about how I completed this project:

Resources That I Used For Learning Arduino
If you’re interested in getting started with Arduino, you may also enjoy the extended edit of my maker video:

Related Posts

This is the third of three posts about learning to code the Arduino. You can read about my decision to make this project in my first post. You can read an update about my early progress in my second post.

References

Burker, J. (2015). The invent to learn: Guide to fun. Torrance, CA: Constructing Modern Knowledge Press. Retrieved from https://www.amazon.com/Invent-Learn-Tinkering-Engineering-Classroom-ebook/dp/B00CQDRF84/ref=sr_1_1_twi_kin_1?ie=UTF8&qid=1501470374&sr=8-1&keywords=kindle+invent+to+learn

Images

All images and videos in this blog post were created by Sarah Van Loo.

Technology Supports for Students: Executive Functioning

Sometimes students come across our path who are late to class, missing materials, and disorganized. They cannot seem to plan their assignments and they turn their work in late. These experiences can be frustrating to teachers, but it is important to remember that they can be frustrating to the students, too! There is a cause for these behaviors. In some cases, the cause is executive functioning (EF) issues.

Planning and Organization: An Executive Function

Papers in a box, to be filed later

Executive functioning is defined as “the mental processes that serve a supervisory role in thinking and behavior. It incorporates a number of neurologically based operations that work together to direct and coordinate our efforts to achieve a goal.” (Cooper-Kahn & Foster, 2013, p. 7).  

Executive functioning includes eight core executive skills, one of which is planning and organization (Goia, Isquith, Guy, & Kenworthy, 2000). Students with Autism Spectrum Disorder (ASD) and nonverbal learning disability (NLD) can be significantly impacted in the skill of planning and organization (Semrud-Clikeman, Fine, & Bedsoe, 2013).

Planning and organization is “the ability to impose order on thoughts, tasks, play, and storage spaces,” (Cooper-Kahn, & Foster, 2013, p. 10). Students with poor planning and organization skills have difficulty breaking larger goals into smaller tasks. They also struggle to organize thoughts into a hierarchy. Their brain has a figurative filing cabinet, but they “just open the drawers and throw things in,” (p. 10). Organization of physical papers can be just as challenging.

A person with planning and organization difficulties may just open the drawer and throw the papers in there.

Consider your student who has a disorganized backpack with everything dumped into the main compartment. Call to mind the student who cannot remember to sign up to give a speech in class, despite your many reminders. Think about the student who rattles off information that doesn’t seem to you to connect to anything else that has been said in class. Those students may have issues with planning and organization.

Learning Skills Through Games

Digital technologies now permeate most areas of our lives. They are readily available at school and at home. We only need to look around at parks, restaurants, and grocery stores to see how widely available they are. Used wisely, technology can be a tool for helping students with learning needs including planning and organization.

Students can learn skills and techniques for planning through digital games like strategy games, simulation games, and role-playing games. In these games, they learn skills such as predicting game events and switching between short- and long-term goals. They learn to prepare for an event by stocking up items in inventory, and they learn from their mistakes (Kulman, 2014).

Games like Minecraft help students develop planning and organization skills. Screenshot by Aidan Van Loo


Games like Minecraft, Scratch, and LittleBIGPlanet help to support planning skills through fun and interactive means. Students need “foresight, planning, dividing the plan into steps, and then actually producing the work,” (Kulman, 2014, p. 118) to be successful.

App Recommendations for the School Setting

In addition to games, there are apps that can be both fun and helpful for students who need support with planning and organization. There is a direct application in the school setting as these tools can support students with the business of doing school.

Students learn planning skills through apps when they use productivity tools to set and prioritize goals and when they search through digital content using keywords (Kulman, 2014).

Two apps that support those skills are Evernote and Wunderlist. They are both powerful apps and are both on my list of regularly used tech tools for school. Either one could provide substantial support for a student. Used together, they can help students plan and prioritize commitments and organize and archive information.

Evernote provides the ability to capture lists, notes, photographs, drawings, and websites. Evernote also has excellent capabilities for archiving information. Because it is searchable, anything that is archived in Evernote can be found again.

Wunderlist is also a powerful list-making tool. The beauty of Wunderlist is that it is possible to prioritize list items with due dates, and to include subitems for each list item. Also, Wunderlist can push notifications to the students, so students who have a difficult time remembering to check a list will be automatically reminded.

With both tools, students are able to make notes and write lists in advance of a project due date. Both tools allow sharing of notes or lists with others. Both tools are available online and as a download to the student’s device. If a student discovers that an Evernote checklist would make more sense as a Wunderlist, it is easy to use Evernote Integration via Task Clone to move that list from one app to the other.

References

Cooper-Kahn, J., & Foster, M. (2013). Boosting executive skills in the classroom: A practical guide for educators. San Francisco, CA: Jossey-Bass.

Gioia, G. A., Isquith, P. K., Guy, S. C., & Kenworthy, L. (2000). TEST REVIEW Behavior Rating Inventory of Executive Function. Child Neuropsychology (Neuropsychology, Development and Cognition: Section C), 6(3), 235-238. doi:10.1076/chin.6.3.235.3152

Kulman, R. (2014). Playing smarter in a digital world: A guide to choosing and using popular video games and apps to improve executive functioning in children and teens. Plantation FL, FL: Specialty Press, Inc.

Semrud-Clikeman, M., Fine, J. G., & Bledsoe, J. (2013). Comparison among children with children with Autism Spectrum Disorder, nonverbal learning disorder and typically developing children on measures of executive functioning. Journal of Autism and Developmental Disorders, 44(2), 331-342. doi:10.1007/s10803-013-1871-2

IMAGES

Unless otherwise captioned, all images and videos in this blog post were created by Sarah Van Loo.

Looking at Self-Portraits Through New Lenses

One foundational project in middle school art class is the creation of self-portraits. Through the creation of self-portraits, students develop several important artistic skills. They practice the skill of portrait drawing, and they practice making aesthetic choices to communicate meaning.

Digital Self-Portrait, by the Author

Unfortunately, some students are self-conscious about drawing or about spending time looking in the mirror. They may be intimidated by the prospect of creating a pencil and paper drawing over the course of many days. They may be nervous about having to add shading and other details.

The good news is that we don’t have to give in to the pressure from some of our students not to do self-portraits at all. In fact, we can keep both the art content and our pedagogy intact. Instead of having students create their self-portraits with paper and pencil, we can have them create using a digital tool like Autodesk SketchBook for the iPad.

Why Use New Technology for an Old Art Problem?

We can find a sweet spot in teaching when we combine our content knowledge (CK), our pedagogical knowledge (PK), and our technological knowledge (TK), referred to as The TPACK Framework (Mishra & Koehler, 2009). In this case, our content knowledge is the knowledge of how to create a self-portrait. Our pedagogical knowledge involves when to model drawing and when to give time for inquiry and exploration.

This work, “TPACK Framework in Digital Self-Portraits”, is a derivative of TPACK by Koehler (2012), used under CC0 1.0. “TPACK Framework in Digital Self-Portraits” is licensed under CC0 1.0 by Sarah Van Loo.

When we add the technological knowledge of a drawing application on the iPad, we find the sweet spot in teaching self-portraiture. By using the iPad instead of a pencil and paper, this assignment may be less intimidating to some students. As a result, they are more willing to explore and investigate. Further, using digital drawing tools, students may:

  • easily create multiple iterations of their self-portrait
  • digitally manipulate the portrait, including tiling, rotating, or flipping it
  • create multiple final versions of a drawing, including using different colors
Looking at My Own Example

In my digital self-portrait example above, I took a different approach to creating a self-portrait than I normally would have. Typically, I would have started by making a line drawing with charcoal or a pencil. I probably would have added some shading, and then I would have been finished.

In my digital self-portrait, instead of focusing on drawing lines, I focused on adding colors, shadows, and highlights. I also used a variety of digital tools, including the airbrush, technical pen, pencil, and watercolor. Having these tools available digitally meant that they were readily available and easy to access; by contrast, using all of these tools in a traditional setting would be cumbersome and time-consuming.

When students are given the opportunity to create digitally, those who may have been hesitant to start drawing will feel like they are at play because of the freedom provided by a wider range of tools. When students enjoy what they are doing, they are more likely to become lifelong artists.

If you would like to try this out in your classroom, here is a link to my plan:

References

Mishra, P., & Koehler, M. (May 2009). Too cool for school? No way! ISTE (International Society for Technology in Education), 14-18.

Images

Featured image: DevilsApricot (Artist). (2016).  Art Supplies, Brushes, Rulers [Digital Image]. Retrieved from Pixabay website: https://pixabay.com/en/art-supplies-brushes-rulers-1324034/. Licensed by CC0 1.0.

Digital self-portrait was created by Sarah Van Loo.

Koehler, M. (Artist). (2012). Derivative of TPACK [Digital Image]. Retrieved from Wikimedia Commons website: https://commons.wikimedia.org/wiki/File:TPACK-new.png. Licensed by CC0 1.0. “TPACK Framework in Digital Self-Portraits” is licensed under CC0 1.0 by Sarah Van Loo.


Learning Arduino: An Update

In an earlier post, I introduced a challenge I set for myself: to learn to code an Arduino microprocessor using only resources that are available online. Ultimately, I will program my LilyPad Arduino USB to illuminate my daughter’s tutu with LEDs.

My Arduino Workspace

Arduino and Me

When I began this adventure, I had little experience with microprocessors, programming, or circuits. My limited experience was from teaching Vex robotics in a tightly scaffolded environment, where it is almost impossible to wire inputs and outputs incorrectly.

This project has been a huge stretch for me, but it is worth it. I wrote in an earlier post about Seymour Papert, the father of making and the theorist behind constructionism. Papert, as cited in Burker (2015), said that there are “Eight Big Ideas Behind the Constructionist Learning Lab” (Loc 1687). I am constructing my own learning by doing, using technology as a building idea, having hard fun, and making to learn – the first four of those eight big ideas.

First Steps

I began by installing the Arduino IDE software on my computer so that I can code my Arduino. I wrote some sketches, instructing my Arduino to blink on and off one second at a time, then on and off 1/10 second at a time.

I began with Blum’s tutorial. Each time I got stuck, I referred to the Getting Started guide. Next I began watching a series of five videos from I Like to Make Stuff. Those videos provided a solid foundation of vocabulary and content knowledge, and helped me move to the next step.

Then Things Got Confusing

LilyPad Arduino

Arduino Uno

Things went pretty smoothly with the I Like to Make Stuff videos until Arduino Programming Part 3 // Maker 101. In that video, Bob Clagett gives instructions on how to program the Arduino to send a message to make an LED blink at different rates using a potentiometer. He sets up the circuit using a breadboard.

At this point, a few things happened at once. Having never used a breadboard,  I concurrently began watching Simply Electronics’ How to Use a BreadBoard. My head was swimming with electronics information, and this was the third YouTube content creator in a row to demonstrate using the Arduino Uno. The Uno is a popular Arduino board.

Thankfully, I had an Arduino Uno available in addition to the LilyPad. Instead of watching videos featuring Uno and trying to translate them for LilyPad, I decided to switch gears and use the Uno instead. It was a huge help. I was then able to use How to Use a BreadBoard to create a circuit with multiple LEDs on a breadboard where the Arduino acted as a power supply.

Then, once I had done that, I was able to follow along with Arduino Programming Part 3 // Maker 101 and make a circuit with one LED and a potentiometer. The potentiometer allowed me to control the rate that the LED was blinking.

Finally, I used my knowledge from the breadboard video to add a second LED that was powered and controlled by the Arduino. The blinking rates of both LEDs could now be controlled by the potentiometer.

Next Steps

I have created a circuit with Arduino Uno instructing two LEDs to blink at a rate that is controlled by a potentiometer. My next step is to figure out how to swap my LilyPad in as the microcontroller, then to learn more about the different kinds of inputs and outputs I can use with my LilyPad.

related posts

This is the second of three posts about learning to code the Arduino. You can read about my decision to make this project in my first post. You can read about how it all worked out in my third post.

References

Burker, J. (2015). The invent to learn: guide to fun. Torrance, CA: Constructing Modern Knowledge Press. Retrieved from https://www.amazon.com/Invent-Learn-Tinkering-Engineering-Classroom-ebook/dp/B00CQDRF84/ref=sr_1_1_twi_kin_1?ie=UTF8&qid=1501470374&sr=8-1&keywords=kindle+invent+to+learn

IMAGES

All images and videos in this blog post were created by Sarah Van Loo.

We Made a Maker Faire!

Our flyer was created by MAETy1 students

One of the bigger surprises of my on-campus experience at Michigan State University was learning that my classmates and I would be making a maker faire. With some help, our group of eight students did most of the work: overseeing the logistics, advertising, planning and running all the booths for visitors.

The Maker Movement and Maker Faires

Making is an important part of my teaching practice. You can read more about it in an earlier blog post I wrote. According to the theory of constructivism, when people make something, they build their own knowledge. They construct new knowledge based on prior knowledge, through direct instruction and through inquiry-based learning (“Constructivism,” 2016).

This understanding has helped spark the Maker Movement and the relatively recent popularity of maker faires around the world. Maker faires are gatherings that range in size and scope, but often include a combination of hands-on activities and demonstrations.

Our Faire

Our maker faire was small, with four booths run by our eight students. Nevertheless, it was well-received by those who attended. Our visitors were engaged and seemed to struggle productively, learn and have fun.

If I were to help plan a maker faire again, I hope we would have more than nine days to plan it. I would include ample signage throughout our event area to help ensure that people could find their way around. As it was, I made a few signs even as the event was getting started.

Our passport was created by MAETy1 students

I would also advertise it as widely as possible. Many people in my cohort shared on social media and in the local news outlets, but more time would allow us to share even more.

Through this event, I learned that it is difficult to keep everyone in the loop when there are eight people involved in planning. When it came to the day of the event, though, it was extremely helpful to have more people pitching in. If I were to do this again, I would request as much community assistance as possible.

Our Booth

My partner Kate Wojtas and I planned and ran a tower building challenge. Participants built a tower of spaghetti and marshmallows, as tall as possible. They had the opportunity to do iterations of their building, and learned about engineering principles, including trusses and cross braces.

If visitors struggled or got stuck, they were ready for teaching by telling (Bransford, Brown, & Cocking (2000). We then asked some guiding questions like, “What can you do to make this more stable, so it doesn’t fall?” We also gave a little information about engineering design, if necessary.

I enjoyed celebrating with builders of all ages. One of the most exciting aspects of watching learners at a maker activity was seeing how they are empowered. When faced with a challenge, our participants struggled, prevailed, and learned that they could do it. Even when their tower fell down, we celebrated with, “You tried! You can try again! How can you do it differently this time?”

Make a Maker Activity

You don’t have to plan an entire maker faire to engage learners in thought-provoking inquiry-based activities. If you are looking for such an activity for your classroom or maker event, tower building challenges are a great option. Here is a link our brainstorming document and to our plan:

Tower Advice

Plan for participants to spend 15-20 minutes on this activity. This activity is sticky, so have hand wipes available for participants, check the floor regularly for dropped marshmallows, and have a cleaning solvent ready to clean the tables at the end. Also, do not expect to reuse materials between participants because used marshmallows are sticky. Really, really sticky.

Preparation and practice are key! Preparation for this activity reminded me again of the importance of trying out an activity before introducing it to students. Even if you have researched the activity or done it before, practice it again. Try to anticipate learners’ questions.

Even after my own preparation and trials, we made a big change to our plan. Some young people tested our activity before we took it to the faire, which was incredibly helpful. Based on that practice, we changed our plan from using straws to using spaghetti. Because spaghetti is brittle, it adds to the challenge and allows participants to easily use different sizes of spaghetti for building.

If you don’t have the opportunity to evaluate your challenge with practice participants first, try doing it again from a different perspective. Literally, try sitting in a low chair to see what your event looks like from a young child’s perspective.

Finally, be engaged and have fun!

References

Bransford, J. D., Brown, A. L., & Cocking, R. R. (Eds.). (2000). How people learn: Brain, mind, experience, and school: Expanded edition. Washington, DC: National Academy Press.

Constructivism. (2016, September 08). Retrieved from https://www.learning-theories.com/constructivism.html

Images

Unless otherwise captioned, all images and videos in this blog post were created by Sarah Van Loo.

Squishy Circuits are one tool students can explore while making.

Making to Learn

As both as an art teacher and as a technology teacher, I have found one thing to be consistent: most children love to make things, although their creations are as different as the children who make them. Whether they are making a painting or sculpture in art class, or a robot or ScratchJr animation in technology class, students who are making are almost always engaged. When I hear other educators reflect on the difficulty of keeping students engaged in class, I typically can think of just a handful of students in the entire school who are not engaged in my classes. Knowing how completely engaged my own students are when making, I understand why making and the “maker movement in education,” are topics that everyone wants to discuss.

So, What is Making?

While some people think of making only in terms of modern technologies, like coding, circuits, and robotics, it refers to the creation of just about anything. According to Dale Dougherty, founder of Make Magazine, every one of us is a maker (Dougherty, 2011). He says we shouldn’t think of makers as inventors, because most people have a difficult time thinking of themselves that way. Instead, he says we should consider making to be more like tinkering: the ability to repair things or make things from scratch. This lost art seems to have been found again, but with a new name: making.

When my daughter learned to sew the ribbons on her ballet shoes, she gained confidence and took ownership. Wearing those shoes next to other dancers brought a sense of community.

Making is born out of two basic human needs: the need to create, and the need to be part of a community, to be social (Martinez & Stager, 2014). Our need to create can be fulfilled by making anything – a handmade dress, a clay bowl, a painting, a good meal, a refurbished engine, or anything else you can imagine. And our need to be part of a community helps to explain the increasing development of hackerspaces, Maker Faires, and other social gatherings that surround making. Dougherty (2011) says of the social aspect of making, “The opportunity to talk about that object, to communicate about it, to tell a story about it is another way we learn at the same time we teach others,” (p. 12). In other words, people love to get together, talk about what they made, and see what others have made.

This definition of making explains why my so many of my students are excited to create the sculpture or the robot,  and why they are also excited to tell everyone about it. It’s why setting aside time in class for sharing is so important. According to Seymour Papert’s theory of constructionism, when students tell about what they make, they learn. Constructionism, according to Martinez & Stager, is “learning by constructing knowledge through the act of making something shareable,” (as cited in Rosenfeld Halverson & Sheridan, 2014, p. 498). It is clear, therefore, that I need to carve out time for sharing to facilitate student learning.

Why is Making in Schools Important?

Whether they are presented with a problem, or identify a problem on their own, students who are makers become problem solvers and critical thinkers. When they figure out a solution for which there is not one single answer, they see themselves as “competent problem solvers who don’t need to be told what to do next,” (Martinez & Stager, 2014).

Building robots with 5th graders is a great experience for my students and me.

The challenge for me, as with every other teacher, is time. There simply isn’t enough of it. Even in a district like mine, where there is a concerted effort to implement project-based learning programs like the one I teach, there never seems to be enough time to cover it all.

What Can I Do?

I can make a conscious choice not to try to teach every single bullet point at a full sprint. I can choose, instead, to use the time I have with my students to cover what I can through student-led inquiry and problem-solving.

Every day, I am privileged to take interesting and engaging learning materials and new technologies into my classrooms. My students are primed to look for problems, figure out answers, make models, and share what they’ve learned. Yet with limited time available to me, I have often felt pressured to rush through teaching every concept.

Although I won’t be getting more time with my students next year, I will get a fresh opportunity to decide how to use the time I have. Instead of focusing on quantity, I am going to focus on quality. I will let my students share what they have made, and in the process, discover what they have learned.

Resources

Dougherty, D. (2011). The maker movement. innovations, 7(3), 11-14. Retrieved from http://www.mitpressjournals.org/doi/pdf/10.1162/INOV_a_00135

Martinez, S., & Stager, G. (2014, July 21). The maker movement: A learning revolution. Retrieved from https://www.iste.org/explore/articleDetail?articleid=106

Rosenfeld Halverson, E., & Sheridan, K. (2014). The maker movement in education. Harvard educational review, 84(4), 495-504. doi:10.17763/haer.84.4.34j1g68140382063

Images

All images and videos in this blog post were created by Sarah Van Loo.

I’m Going to Learn to Code Arduino!

For my summer 2017 classes in my coursework at Michigan State University (Master of Arts in Educational Technology), I am being challenged to learn something new using only online resources, such as YouTube, my professional learning network, and Internet help forums. When this challenge was issued, I immediately gravitated toward learning to program Arduino.

WHY ARE WE DOING THIS?

This period in education is an exciting one, one in which many students have technology at their fingertips. Although social media can be a distraction, it can also be a tool in the classroom. According to Ito et al. (2013), we can utilize social media for connected learning, and through connected learning, some equity gaps we see in school can be closed.

Wealthy families have already taken advantage of technology to provide additional learning experiences for their children, widening the equity gap. Nevertheless, through the power of connected learning, all students have access to a network of peers and caring adults. When using social media for learning, subject matter becomes “interest-powered,” relevant, and interesting to the learner (Ito et al., 2013, p. 4).

This is an ambitious project; however, by undertaking this, I will gain meaningful and firsthand experience with the power of connected learning. And through this experience, I expect to become an avid proponent of this method of learning.

INSPIRATION

I am an artist and maker. I especially love to make things that are 3-dimensional and interactive, such as a sculpture I once made. When the viewer pressed a button, a light illuminated the inside of the sculpture for a few seconds, then flickered and went out. That light was controlled by Arduino.

An Arduino Uno microcontroller controlled the light in this sculpture

The making of that sculpture was exciting, and allowed me to grow as an artist. I learned about making boxes, pushed my Photoshop skills, and designed and crafted a mechanism that made the images inside change, among other skills. However, when it came to that Arduino, I was stuck. Without time to learn the processes of coding and soldering that would be required to make that Arduino do what I wanted, I solicited the services of my husband to make the electronics work. Many times I have reflected on that sculpture as one of my favorite artworks that I have made, but that at the same time showed one of my shortcomings as a maker.

WHAT I’M GOING TO DO

Arduino is a favorite tool of artists and makers. It is a programmable microcontroller. While I am still figuring out what exactly that means, I do understand that it involves a small piece of hardware (smaller than a phone) that can be programmed using Arduino software. It can process a variety of inputs, and give some sort of output.

Although Arduino is capable of producing many types of output, I will program my Arduino to do something with light. I plan to use my newly programmed microcontroller to illuminate a tutu that my daughter has. There are many resources on the Internet for using Lilypad Arduino, including an article by Gadget Hacks, How to Embed Lights Into Fabric and Clothes with LilyPad.

Here is just one example of an Arduino microcontroller being used by an artist. This image is of a Lilypad Arduino in use:

To get started with preparing for this project, I bookmarked just a few of the many Arduino resources that are available on the Internet:

Related Posts

This is the first of three posts about learning to code the Arduino. You can read an update about my early progress in my second post. You can read about how it all worked out in my third post.

References

Ito, M., Gutiérrez, K., Livingstone, S., Penuel, B., Rhodes, J., Salen, K., . . . Watkins, S. (2013). Connect learning: An agenda for research and design: A research synthesis report of the Connected Learning Research Network (summary) (Rep.). Irvine, CA: Digital Media and Learning Research Hub.

Images

Iwasaki, O. (Photographer). (2009). A flexible Lilypad Arduino sewn in textiles with 20 LEDs which fade in and out at random [digital image]. Retrieved from Wikimedia Commons website: https://commons.wikimedia.org/wiki/File:Lilypad_Arduino_with_fading_LEDs.jpg

All other images in this blog post were created by Sarah Van Loo.